Installation system
How Interlocking Concrete Pavers Are Installed
The paver pattern is only the top of the surface. How the ground underneath is assessed and prepared largely decides whether a patio or walkway stays level. This page explains a conventional, non-permeable interlocking paver system so you can judge a proposal. It is not a construction specification.
The layers, at a glance
From the bottom up: prepared subgrade, separator fabric where needed, compacted aggregate base, a thin bedding layer, then the pavers with filled joints, held in by an edge restraint. The finished surface is pitched so water runs away from the house. Permeable paver systems use a different, open-graded base and are not interchangeable with this design; see permeable pavers in Minnesota.
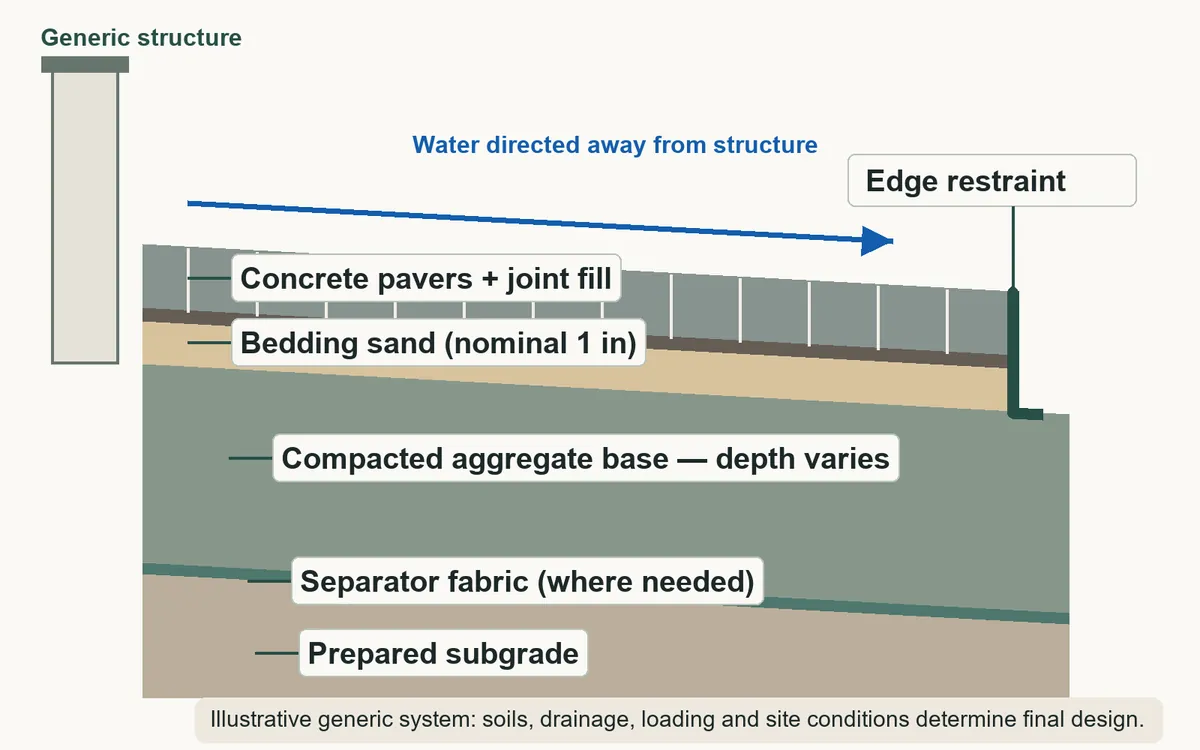
Open the full-size diagram (1600 × 1000 image, easier to read on a phone)
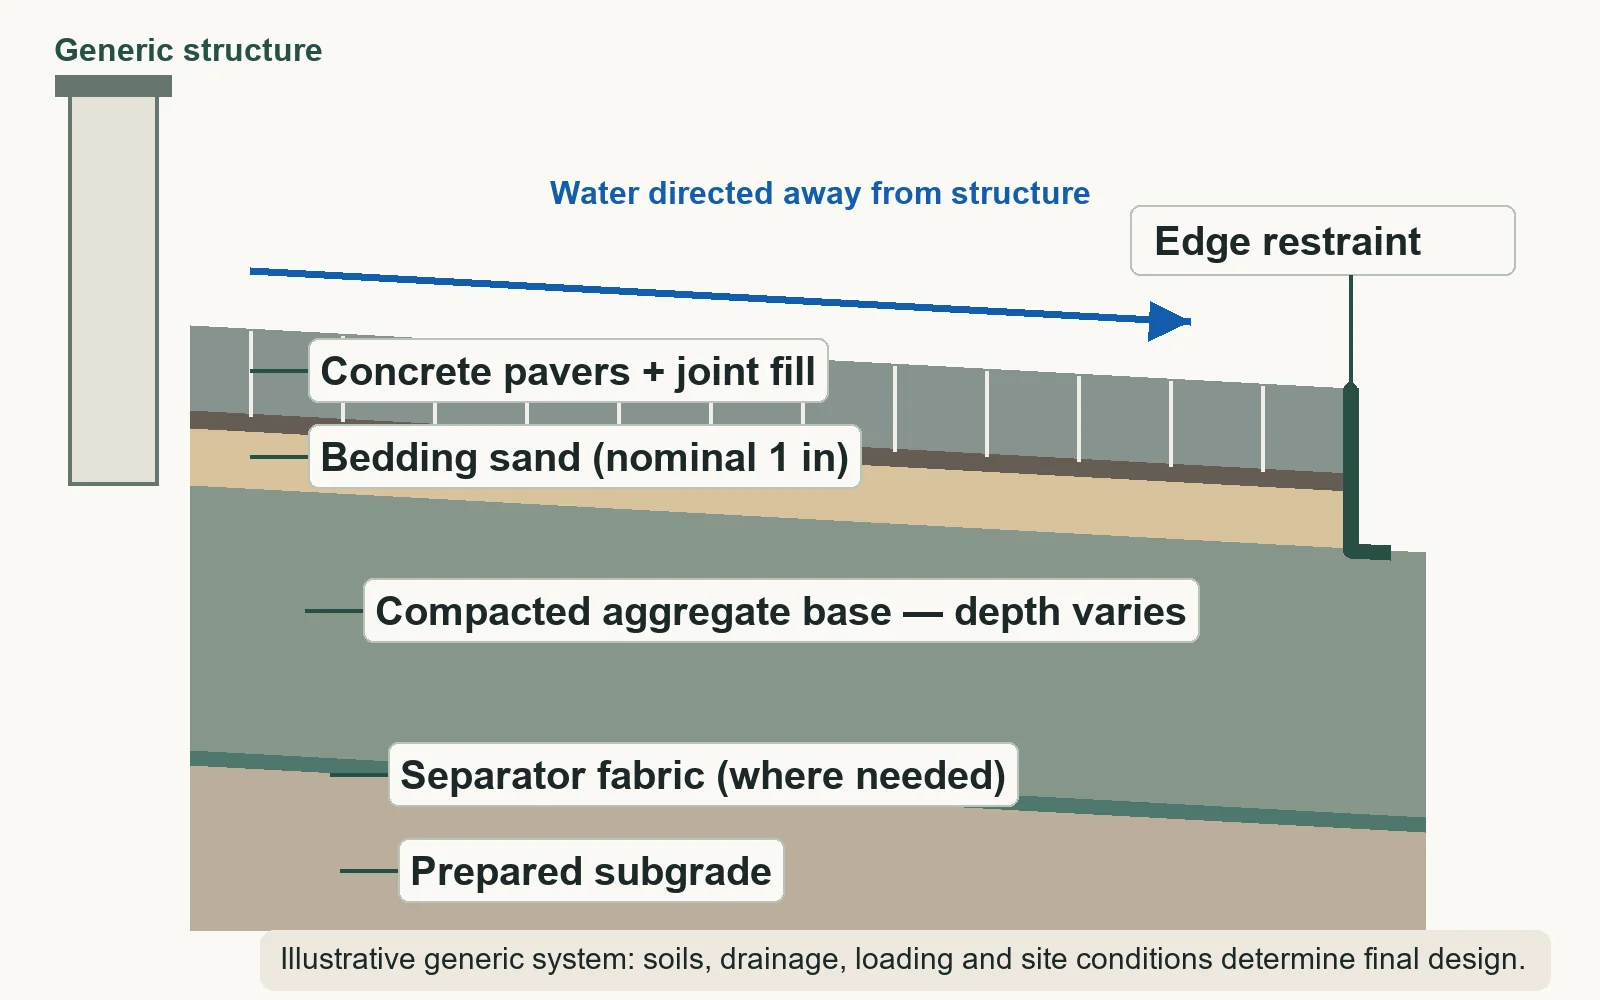
What each layer does
- Concrete pavers and joint fill. Units interlock; sand or polymeric sand fills the narrow joints.
- Bedding sand. A thin screeded layer that sets paver height. Industry guidance commonly describes it as about 1 inch nominal; it is not used to fill dips in the base.
- Compacted aggregate base. Carries and spreads loads. Its thickness depends on soil, drainage, climate and use, so no single depth is shown.
- Separator fabric, where needed. Keeps base and subgrade from mixing; commonly recommended on cold, wet or weak soils.
- Prepared subgrade. The native soil, graded and compacted before any base goes in.
- Edge restraint. Holds the field together; it sits on the base, which extends past the paver edge.
Generic, not to scale and not a construction specification. Permeable paver systems use a different, open-graded base. AI-generated illustration for planning purposes; not a completed Concrete Pavers Guide project.
The installation sequence
Typical order of work for a conventional sand-set patio. A contractor's proposal should account for every step.
- Site assessmentGrade, existing drainage, soil, access, buried utilities and the loads the surface will carry.
- ExcavationRemove topsoil and organic material to expose the subgrade.
- Subgrade preparationGrade to the planned slope and compact; correct soft or wet spots.
- Separator fabric, where neededOn cold, wet or weak soils, to keep base and soil apart.
- Aggregate basePlaced and compacted in layers, carrying the slope.
- Bedding layerA thin screeded layer that sets paver height; not used to fill dips.
- Pavers and edge restraintUnits laid in pattern; restraint set on the base at the outer edge.
- Compaction, joints and final checkCompact, fill joints, then confirm water runs away from the house.
Layer-by-layer: what to ask
| Part | What it does | Warning signs | Ask the installer |
|---|---|---|---|
| Prepared subgrade | Native soil the system rests on, graded to slope and compacted | Soft, wet or organic soil left in place | What did you find when you dug, and how will you correct soft spots? |
| Separator fabric | Keeps base aggregate from mixing into the soil | Base gradually sinking into clay or wet ground | Will you use fabric on this soil, and why or why not? |
| Compacted aggregate base | Carries and spreads loads; holds the slope | Settling, dips, ruts | What base material and thickness, compacted in how many layers? |
| Bedding sand | Thin screeded layer that sets paver height (about 1 in. nominal in industry guidance) | Rocking pavers, an uneven surface | What bedding material and thickness? (It should not be used to fill dips in the base.) |
| Pavers and joint fill | The wearing surface; joints let units interlock | Empty joints, weeds, ants, loose units | Which joint material, and what upkeep should I expect? |
| Edge restraint | Stops the field from spreading outward | Gaps opening along the edges | Which restraint, and how is it anchored into the base? |
| Surface grading | Routes water off the surface and away from the house | Ponding, water flowing toward the foundation | Where will water go, and can you show me the grading plan? |
Why base depth varies
The base is usually crushed aggregate, placed and compacted in layers. Its thickness is a design decision, not a fixed number.
Why recommendations differ
ICPI guidance, as cited by secondary industry sources, sets a minimum of about 4 inches of compacted base for patios and walks on well-drained soil and about 6 inches for residential driveways, with substantially thicker bases (one guide says 50–100% more) on cold, wet or weak soils. Contractor guides in freeze–thaw regions report thicker bases in practice. There is no verified single base depth for every Faribault property. Ask what the contractor observed or assumed about your subgrade, water and use, and what would make them change the design.
Southern Minnesota soils are often described as clay-heavy, but conditions vary from lot to lot, and no site-specific soil data for Faribault was found in our research. The climate reasoning is in the Minnesota base and drainage guide.
Minnesota frost depth is not patio excavation depth
Minnesota's residential code sets footing frost-protection depths: 42 inches in Zone II, which covers the Twin Cities metro and most of southern Minnesota, and 60 inches in Zone I to the north. That rule is about footings for structures such as decks and additions. It is not an instruction to excavate a paver patio base to 42 inches. Be wary of a proposal that mixes the two up.
Drainage and finished height
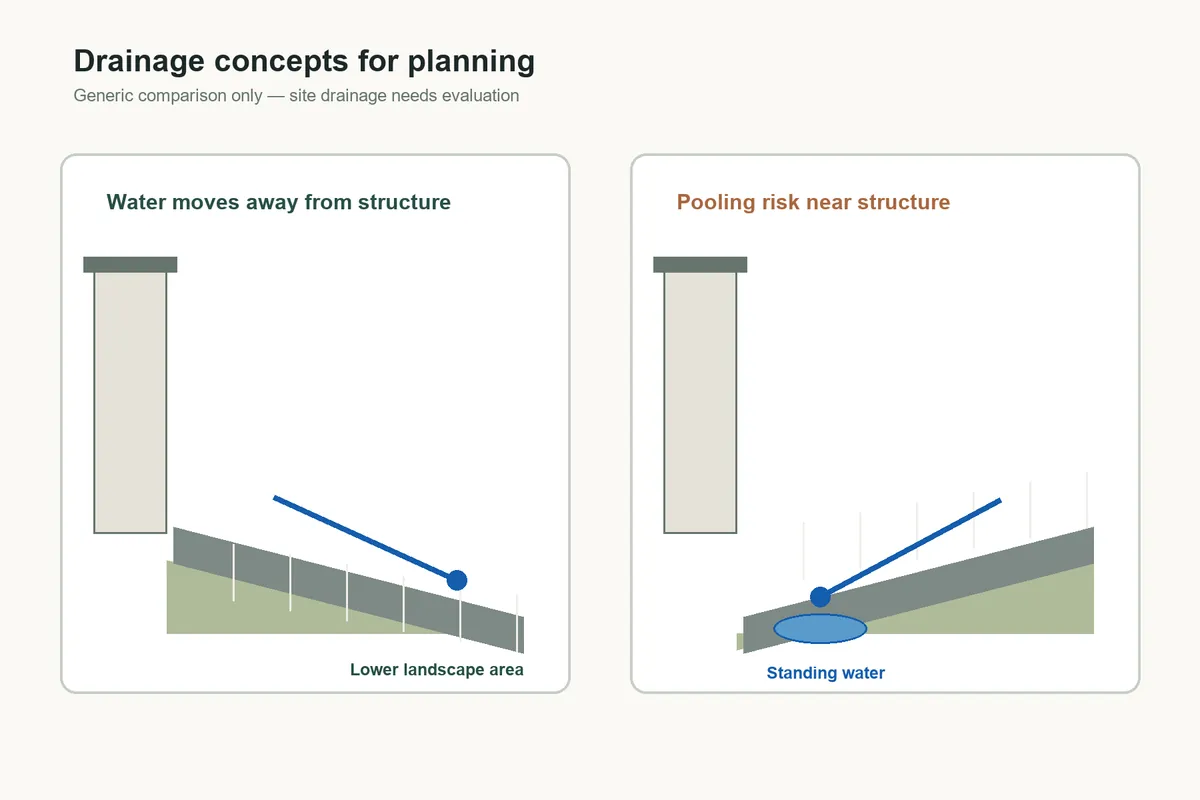
Surface water should be routed on purpose: away from the foundation, not onto a neighbor's property, and toward lawn, a swale or a drain rather than a low corner. Guidance citing the International Residential Code calls for hard surfaces to slope away from the foundation at a minimum of 2%, roughly ¼ inch per foot. That slope belongs in the compacted base and carries up through the bedding; it cannot be fixed by tilting the top pavers. The finished surface also needs to sit well below siding, the sill plate and any weep holes, and should be checked against door thresholds.
Walkways and patios vs driveways
A surface that cars drive on is a different design. Do not assume a patio specification can be extended to a driveway — see paver driveways.
| Patio or walkway (foot traffic) | Residential driveway (vehicles) | |
|---|---|---|
| Typical paver thickness | About 60 mm (2⅜ in.) | About 80 mm (3⅛ in.) |
| Minimum base, well-drained soil | About 4 in. | About 6 in. |
| Cold, wet or weak soil | Thicker base in both cases; set by site assessment | |
| Laying pattern | Any; running bond is common | Herringbone recommended for interlock under turning tires |
| Edge restraint | Required in both cases | |
Industry guidance as cited by secondary sources (RemodelCalculators, citing ICPI Tech Specs 2–4; checked Oct. 25, 2026). Typical values, not a design for your site.
Edge restraints and joint sand
Interlocking pavers only interlock if something stops the field from spreading and the joints stay full. Secondary sources citing ICPI Tech Spec 3 describe an edge restraint as mandatory for every sand-set installation.
Edge restraint
- Types: plastic (HDPE) snap edging is cheapest and shortest-lived; aluminum or steel is stiffer and better on long curves; a poured concrete curb costs most and needs least upkeep, and one guide calls for it where plows touch the surface.
- Position: the restraint sits on the compacted base, tight to the outer course — not on bedding sand — and the base should extend at least 6 inches past the paver edge.
- Anchoring: spikes need to bite into base, not soil; one guide says spikes in soil can pull free within a single freeze–thaw cycle.
- Spike spacing differs by source: one guide gives 12 inches on center for pedestrian runs, 8 inches for driveways and 6–10 inches on curves; another gives 12–18 inches. Ask which spacing is planned and why.
Joint sand
| Regular joint sand | Polymeric sand | |
|---|---|---|
| What it is | Loose sand or stone fines, held by compaction | Graded sand with a binder that hardens after wetting |
| Weeds and ants | Poor resistance | Good resistance once cured |
| Washout | Washes out with rain and cleaning | Very little once cured |
| Installation | Sweep in and compact | Needs dry pavers, no residue and careful watering |
| Freeze–thaw | Does not crack, but needs topping up | Disputed: one source says it can crack, another says it holds up |
| Before re-sanding | About 1–3 years | 3–10, 5–10 or 8–15 years by source |
Edge and joint figures: RemodelCalculators (checked Oct. 25, 2026) plus guides summarized in research; ranges, not a specification. Ongoing joint care is in paver sealing and maintenance.
Why paver surfaces fail
| Cause | What you would see | Question to ask before work starts |
|---|---|---|
| Soft or wet subgrade left in place | Low spots and settling in patches | How will you handle soft areas found during excavation? |
| Base too thin for the soil or load | General settling; ruts on drives | Why this base thickness for my soil and use? |
| Missing or weak edge restraint | Pavers creeping outward; joints widening at the edge | What restraint, and how is it anchored? |
| Joint material lost | Weeds, ants, loose units | How is joint material installed, and when will it need topping up? |
| Surface pitched the wrong way | Ponding; water running toward the foundation | Can you show me the grading plan? |
| Finished height too close to siding | Moisture at siding, weep holes or door thresholds | How will the finished height relate to siding and doors? |
Catching these early usually means a smaller repair: individual pavers can be lifted, the cause corrected and the units relaid. See paver repair and restoration.
Maintenance
Periodic sweeping and inspection help catch lost joint material, settling, ponding or edge movement early; a seasonal checklist is in paver sealing and maintenance. Sources disagree on how some chloride de-icers affect concrete, so follow the paver manufacturer's guidance rather than any blanket rule (details in winter paver care). For layout decisions, see paver patio planning; to check that bidders included the same work, use the quote inclusions table.
Installation questions
How deep should the base be under my patio?
There is no single answer for every property, and no website can set one for yours. Published industry guidance starts from a minimum for well-drained soil and calls for more in wet, weak or cold conditions. Ask the contractor what they observed about your soil and water and how that shaped their base design.
Is polymeric sand better than regular joint sand?
It depends. Polymeric sand resists washout and weeds better but is less flexible and needs dry conditions to install. Sources disagree on how well it holds up through freeze–thaw. Ask the installer which product they specify for this climate and why; the trade-offs are compared under edge restraints and joint sand.
Sources and limitations
- ICPI Tech Specs 2, 3 and 4 (construction, edge restraints, laying patterns) — Interlocking Concrete Pavement Institute, now part of the Concrete Masonry & Hardscapes Association (CMHA). Minimum bases for well-drained soils (4 in. pedestrian, 6 in. residential driveway), thicker bases on cold, wet or weak soils, bedding about 1 in., mandatory edge restraint and herringbone for vehicle areas, as cited by the RemodelCalculators guide below and mirrored copies reviewed in research. Limitation: The current official editions were not publicly available to check on October 25, 2026, so these figures are secondary industry guidance, not a design for a specific property.
- 7 Minnesota residential code rules that come up on every job (Minn. R. 1303.1600) (opens in a new tab) — Code Pass. Page dated May 27, 2026, checked October 25, 2026; footing frost depth 42 inches in Zone II (Twin Cities metro and most of southern Minnesota) and 60 inches in Zone I. Limitation: Footing requirement only; secondary summary of the code. The rule itself lists counties by zone.
- Should Your Patio Go Right Up to the House? (opens in a new tab) — EngineerFix. Checked October 25, 2026; citing the International Residential Code, impervious surfaces should slope away from the foundation at a minimum of 2%, with the finished grade well below the sill plate, weep holes and siding. Limitation: Secondary guidance citing model code; local code governs.
- Paver & Patio Installation: The Complete Technical Guide (opens in a new tab) — RemodelCalculators. Checked October 25, 2026; ICPI base minimums, 50–100% more base plus non-woven geotextile on cold, wet or weak subgrade, 1 in. bedding sand, edge restraint mandatory with base extending at least 6 in. past the paver edge, restraint types, spike spacing of 12 in. pedestrian and 8 in. driveway, spikes in soil pulling free within one freeze–thaw cycle, herringbone for vehicular areas. Limitation: Secondary source; spike spacing figures differ between guides.
- Edge restraint and joint sand guidance summarized in research — EngineerFix; Craft Pavers; Vista Hardscape; Groutastic. As summarized in research reviewed October 2026: spike spacing of 12–18 in. in one guide; restraint on the base, top flush or slightly below the pavers; regular vs polymeric sand composition, washout and weed resistance; polymeric freeze–thaw behaviour disputed; re-sanding after 1–3 years (regular) vs 3–10, 5–10 or 8–15 years (polymeric). Limitation: Not re-checked at each source for this page.